
Holiday Garland
How-to
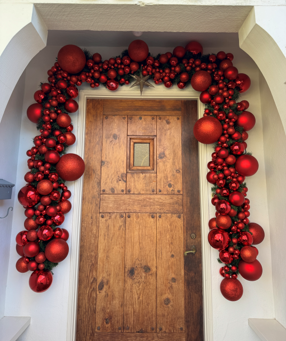
Did you know that on September 16 we officially hit 100 days until Christmas? By the time you're reading this, we're already under that. The countdown is on!
The Christmas items are just starting to hit the stores, and the good news is you can find everything you need for this project online and get a jump on things without stress. This garland has a joyful “bubble’ feel and is striking from the street - something other than your typical greenery. Depending on the materials you buy (you’ll see below), your garland should be fine withstanding the elements, just make sure to buy outdoor components.
STEP 1
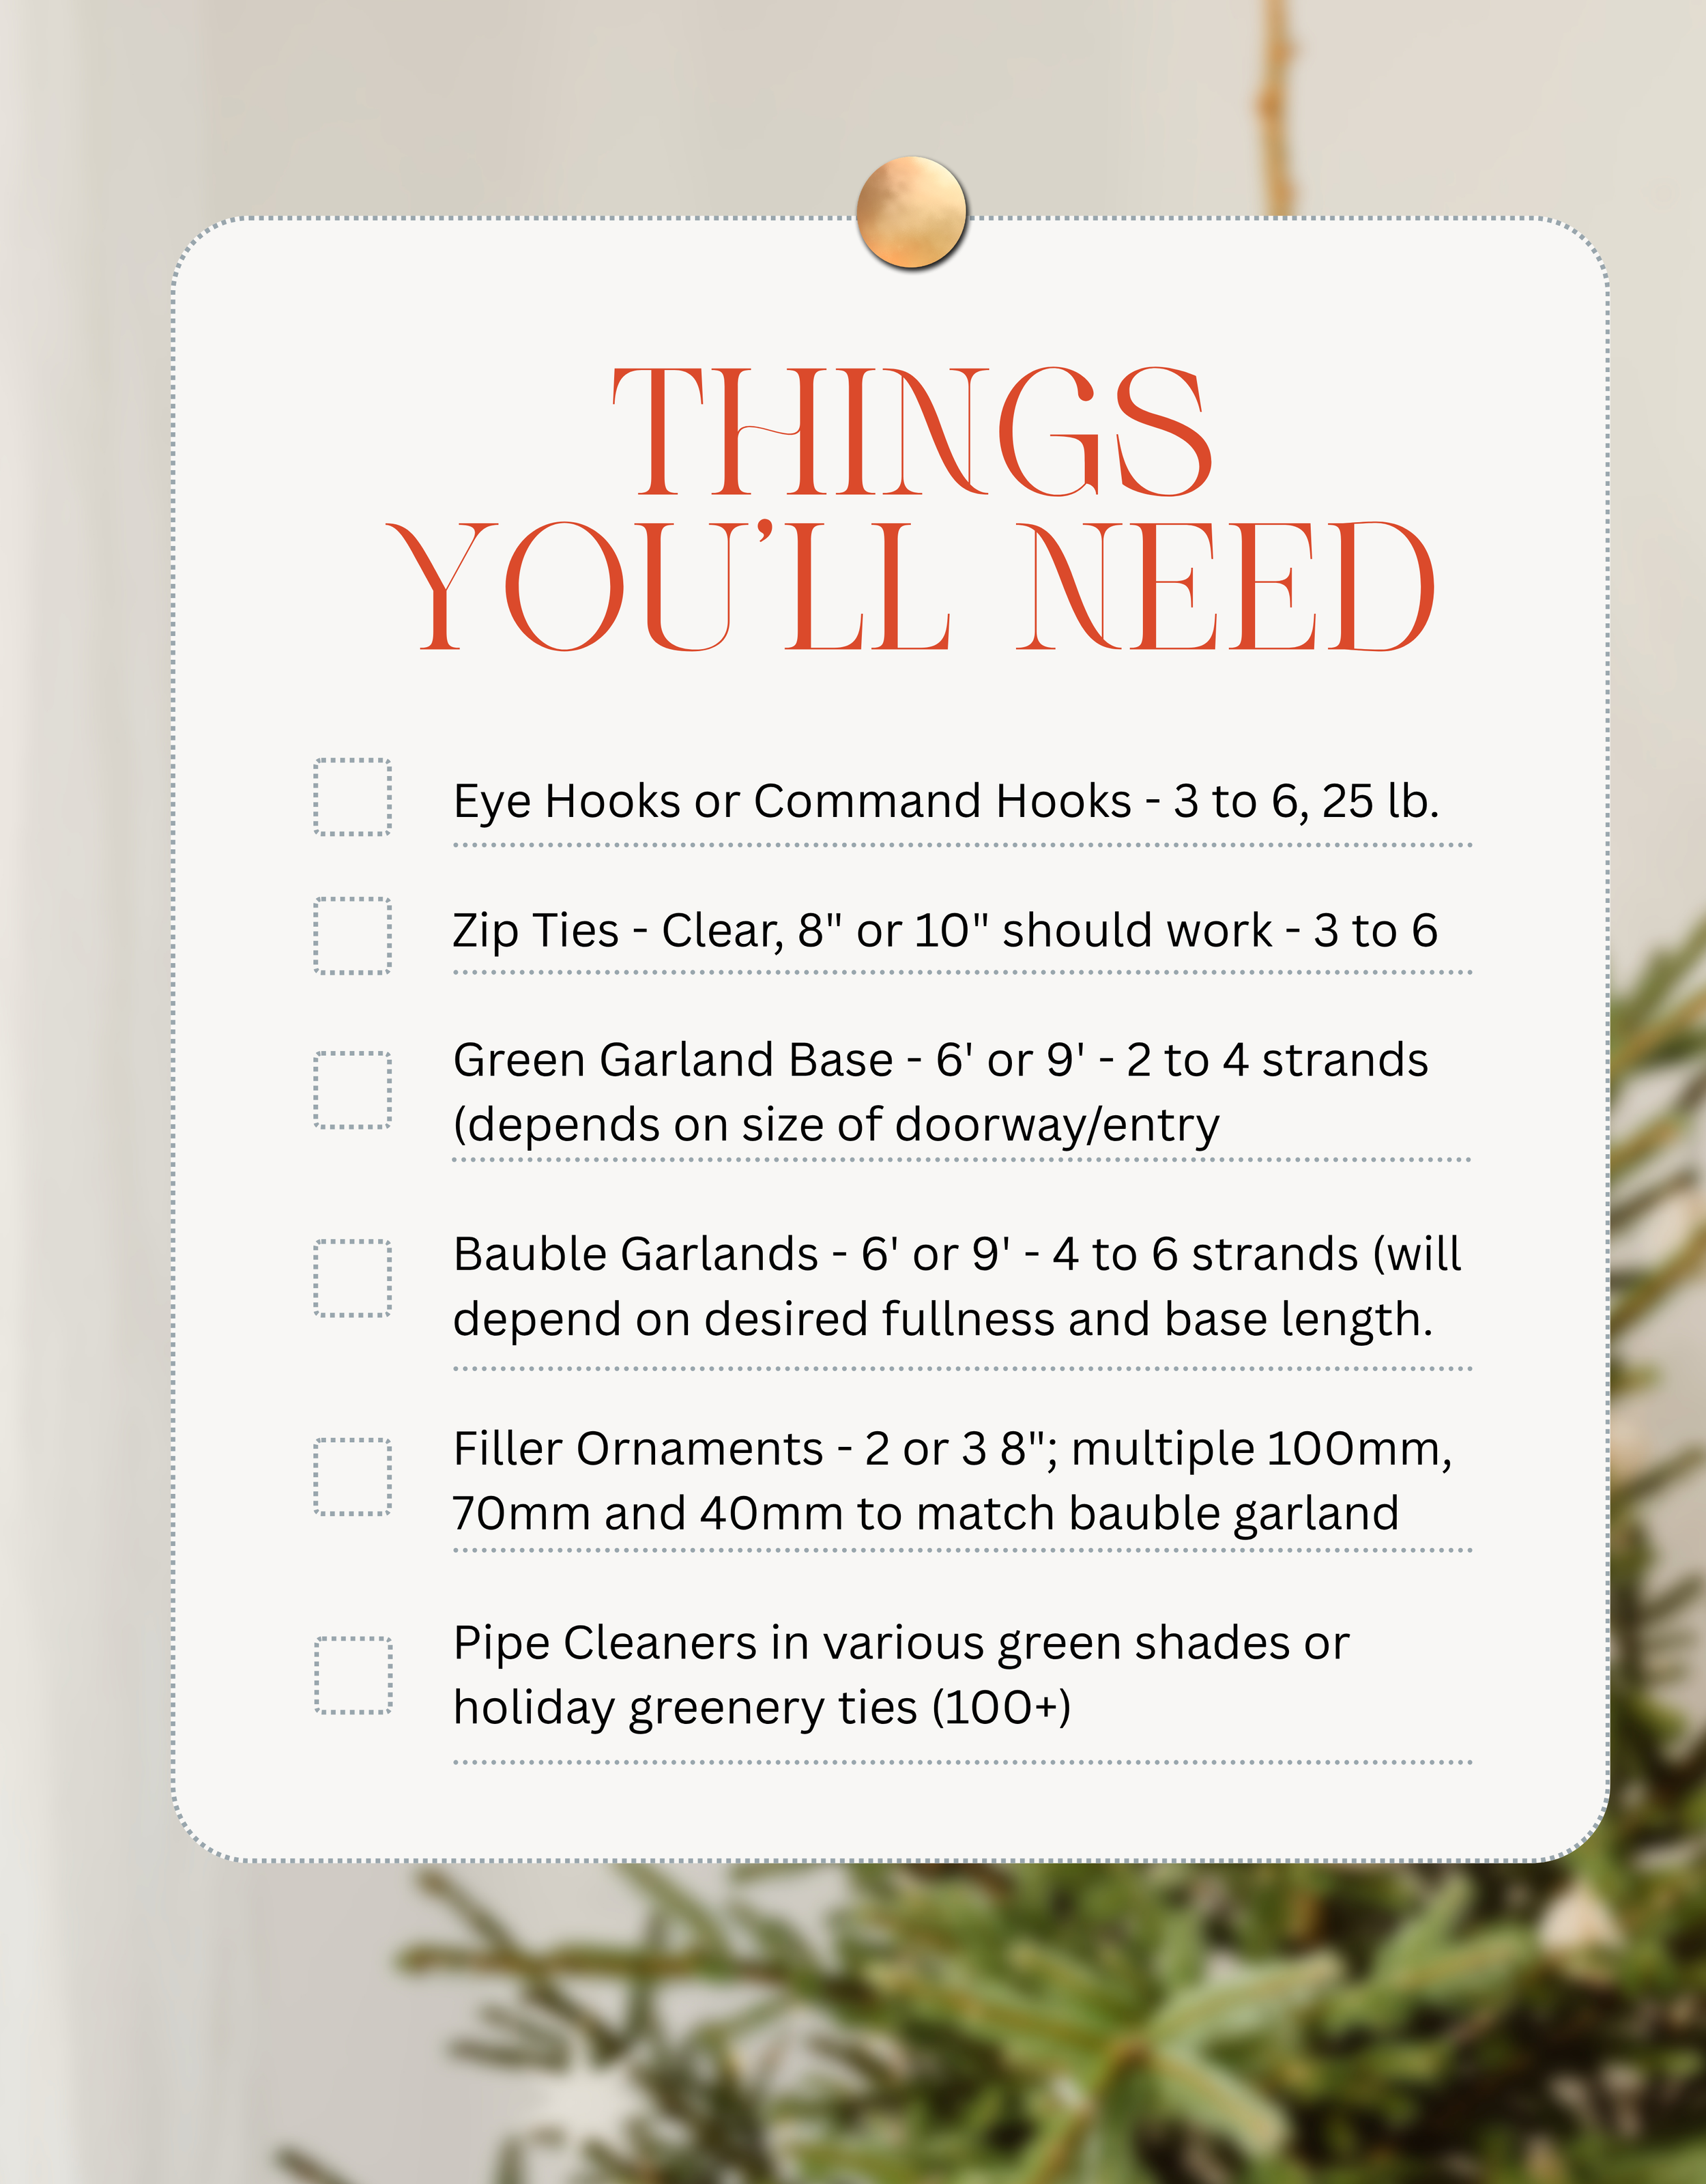
Determine where and how you’ll hang your garland
Placement
How far out from the door frame you place yours really depends on your entry space and how visible you want the garland to be. Take a step back, look at the doorway from the street, or from across the room, and trust your eye.
Think about the size of your door and how long you want the garland to hang. If you've got the room, you can bring it up to a point at the top and create a swag. (I didn't have the space, but it's a gorgeous look if you do.)
Hanging Options
Eye Screws-Since I decorate every year, I keep three eye screws permanently in my wall: one on each side, just out from the corners of the door frame, and one in the center. Set it up once and you're ready every season.
Command Hooks-A no-drill option is to use Command hooks. Make sure you buy the appropriate hook shape and weight capacity. The garland isn’t overly heavy.
STEP 2

Pick your color.
Here’s the fun part.
What color story do you want? Silver or red is the easiest to pull off and always looks classic, but, it's your holiday. Go with what makes you happy - there are many options and you can mix things up. Multicolor base and emphasis filler ornaments; mix silver and champagne; go non-traditional with blue; etc.
STEP 3
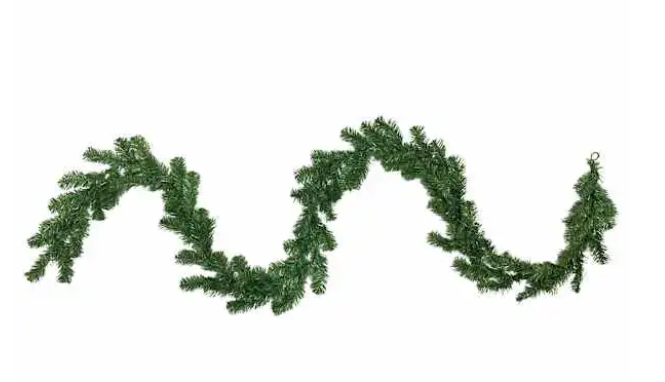
Prep your garlands.
Green Garland Base.
For a single standard door, grab 2 or 3 green pine garlands. They usually come in 6 or 9 foot lengths. Your garland doesn't need to be super dense or thick. It's just your base, so what matters most is that it's sturdy enough to attach everything else to.
Ornament (Bauble) Garland.
Time to bring in the sparkle! Search online for shatterproof ornament garland in the color you picked. When I wrote this, I found them at At Home, Home Depot, Wayfair, Bed Bath & Beyond, Walmart, and Christmas Central.
Here's my designer tip: look for a garland with different size balls and a mix of finishes, like matte, shiny, and glitter. That variety gives your garland real dimension, and it's much more forgiving if your reds don't match exactly.
Buy one more ornament garland than the number of green garlands you're getting. And if you can find a store near you that carries them, I really encourage you to go in person. Seeing the colors and sizes up close makes all the difference.
Links for things you’ll need (or source at your faves):
At Home Bauble Garland - multiple color options
Amazon Bauble Garland - multiple color options
Filler Ornaments - Shatterproof (At Home ornament links, but you can find on Amazon, Wayfair, Target, etc. - as large combo kits or smaller sets).
STEP 4
Bringing it all together - garland assembly.
First, attach your green garland to the wall/entry, however you've chosen to hang it. I use zip ties to secure my garland to the eye screws (or to your command hooks if you use those).
Next, attach your ornament garland, letting it meander along the green garland. I use green pipe cleaners in sage, moss, or olive for this. Those shades blend right into the pine, so you don't have to be super careful about hiding and tucking every little end.
Then, fill in any gaps with individual ornaments in different sizes and finishes, attached with those same pipe cleaners. A little pine will peek through here and there, but you won't see much of it, and that's exactly the look we're going for.
And this is why I say red and silver are the easiest. The shades don't vary as much from piece to piece, and they're so easy to find.
If you want your garland to look like mine in the first image; then you need to stock up on filler ornaments.
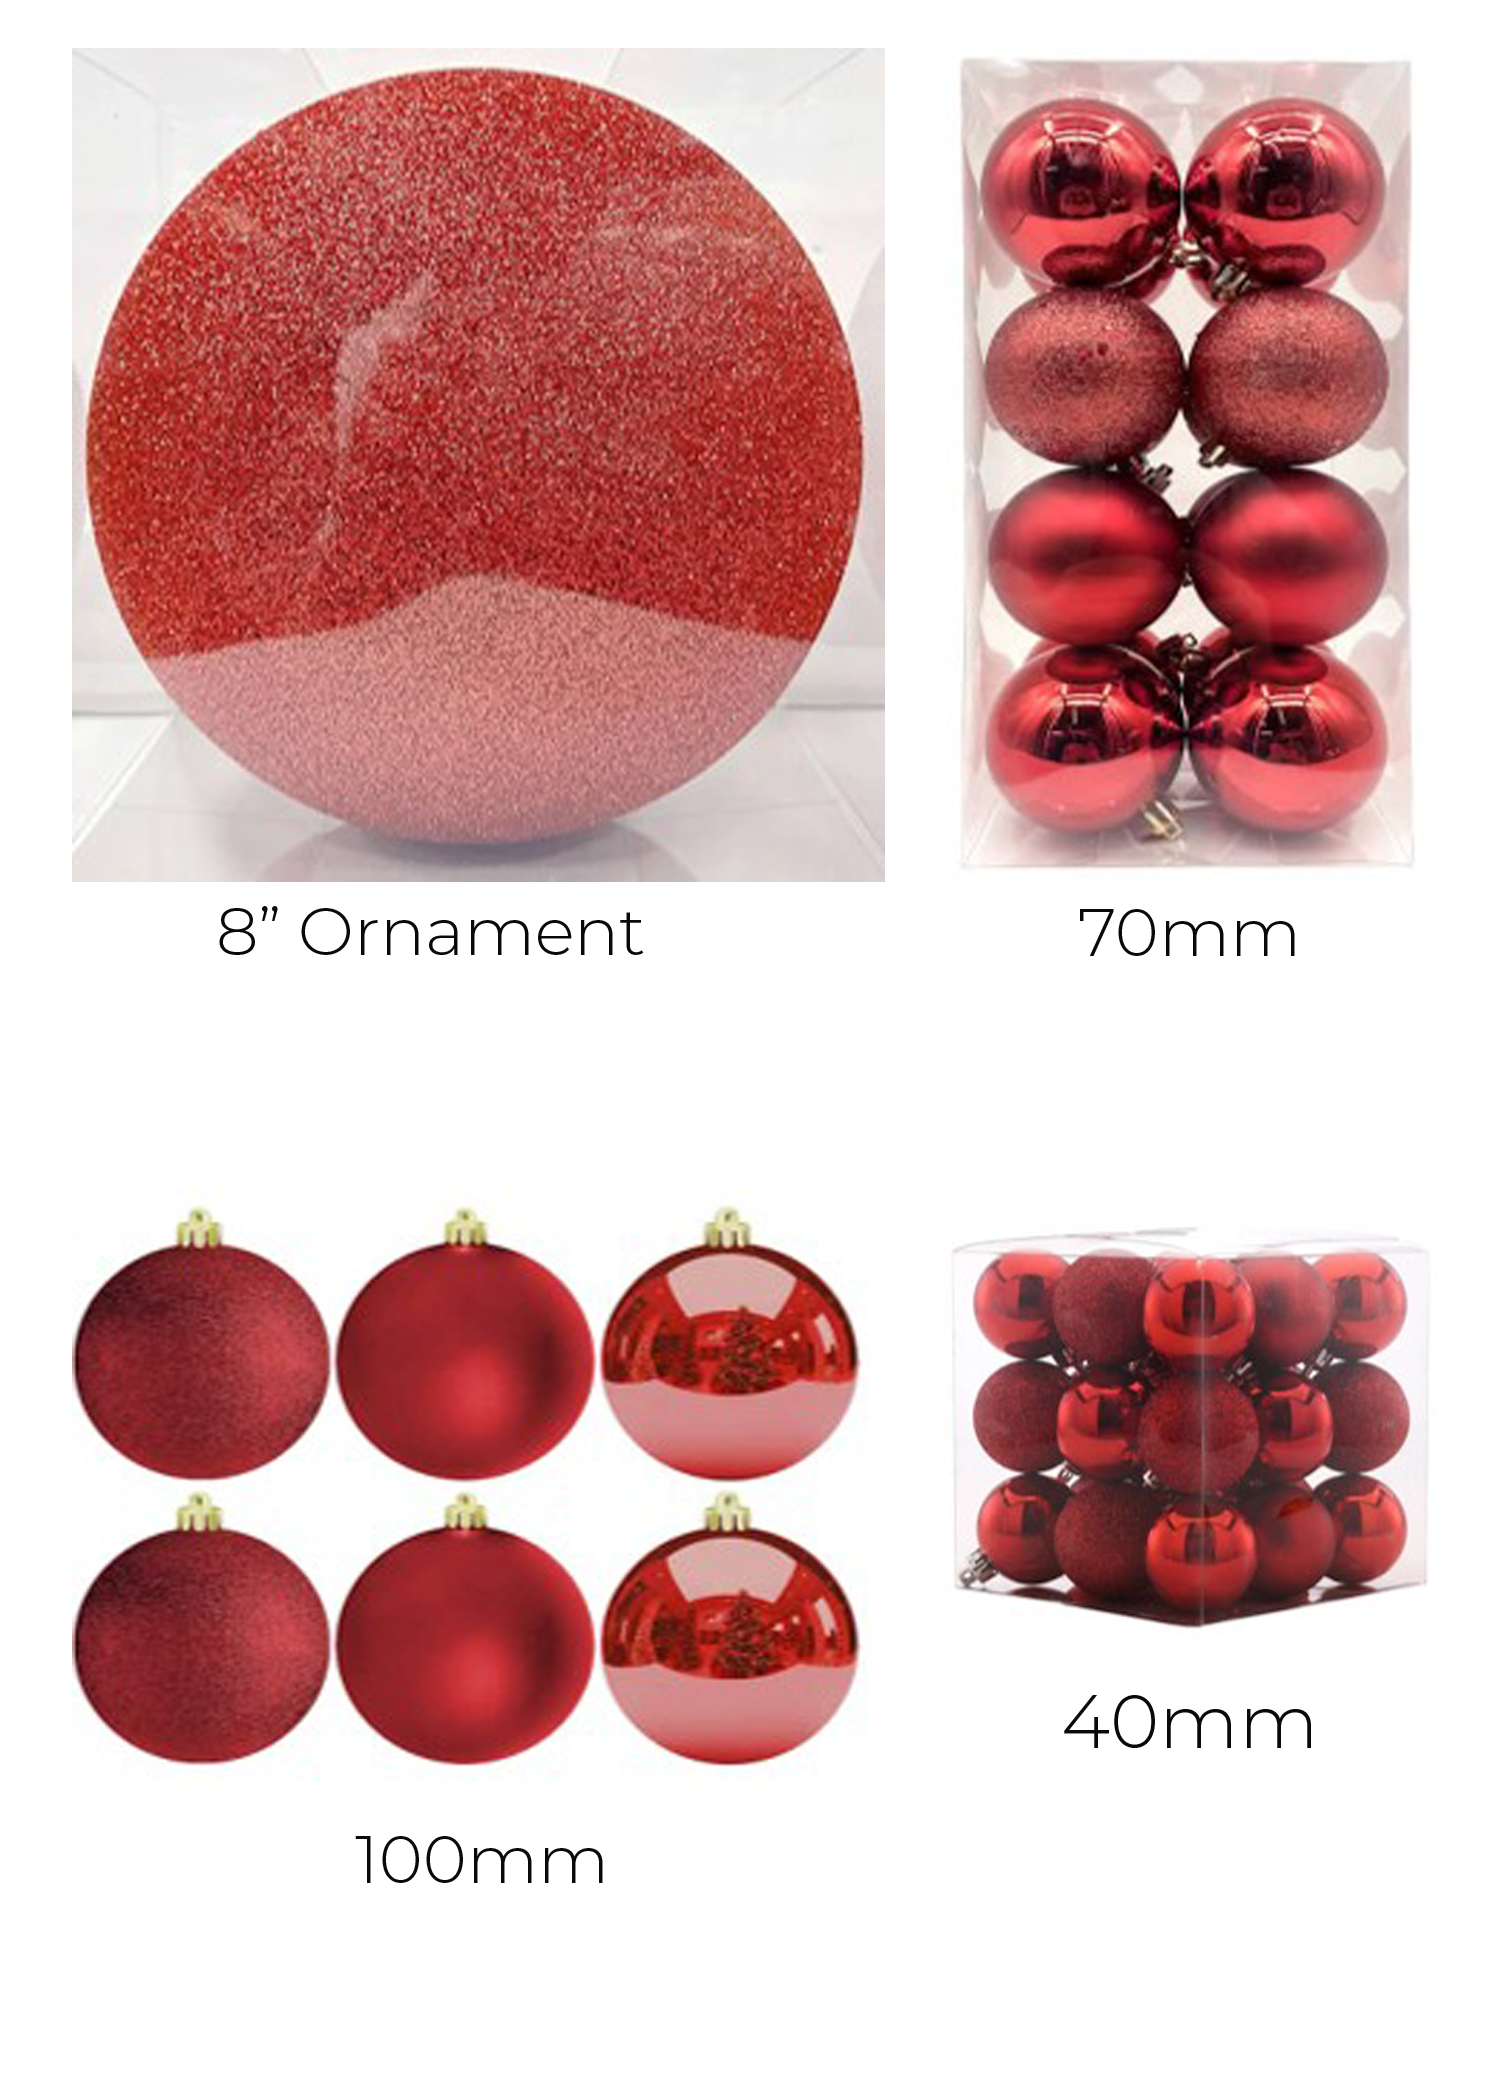
Here are some sizes to consider for your filler ornaments
I can't tell you exactly how many filler ornaments you'll need, but if you want yours full and dense like mine, plan on getting quite a few of each size.
Honestly, the first year is the hardest. It takes some trial and error to get the quantity and the density just right. But once it's done, next year is a breeze.
Storage for next year.
When the season wraps up, I pack everything into plastic storage bins, and it's all ready to pull out next year. Future you will be so thankful! I disassemble my garland into all its components for storage, but you may choose to store the fully assembled garland.